The idea as I understand it, is that the initial activity is likely to be caused by local yeast rather than the dormant yeast I'm trying to wake up. After a day or so the bacteria contained in the package becomes active enough to acidify the culture to a level that the intended yeast copes better with than the local yeast, and from that point on the symbiotic relationship between the yeast and bacteria in the package stabilises through repeated feedings, strengthening the culture over a period of about 5 days.
Just as promised, after the mid-week lull, the culture sprang back to life and by Friday night it was coming out over the top of the jar.
 |
| Sourdough-slick |
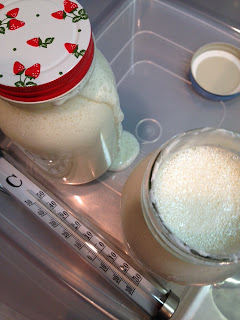
After having sorted out the spillage, Saturday morning I prepared the culture proof. I prepared 2 amounts of starter and set them up in the proofing box at about 21 degrees for the first couple of hours, and a higher temperature later on, for the best combination of leavening power and tang from the acidity. You can see in the pics below that the volume of culture increased a fair way during this time.
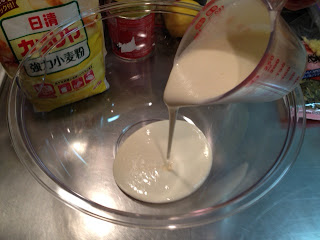
After about 10 hours we were ready to go. 240g of starter mixed with the rest of the ingredients.
I decided to make one very basic white sourdough with just flour, water and salt as additional ingredients, and a set of bread rolls with wholewheat flour, milk, sugar, melted butter and pumpkin seeds (at my partner's request). This is kneaded until the consistency changes from an easily tearable dough, to a satiny stretchy one.
You're supposed to test whether or not it's done by taking a pinch of dough and stretching it out between your fingers - if it gets thin enough to let light through then the gluten is developed enough, if it tears then you need to keep kneading. I've got to say, though I followed the recipe I felt that the dough was fairly dry. Depending on the humidity of the day and the flour, a given recipe can require more, or less water and so the amount stated in a recipe is a guideline. The Ed Wood recipes do seem to make quite a dry dough, next time I'll aim for a slightly wetter dough I think.
The dough was set to proof overnight, for a further 8-12 hours, in a large bowl covered by plastic wrap. I was surprised to see how much it had risen! (See the amount of dough in my hands in the picture above, and how full the bowl became on the right?) Perhaps a bit too much.. I'll have to experiment with this.
After turning out onto a lightly floured board, and resting 30 mins, the shaping begins. Here you can see the large ball of white dough that will become the boule, and the little portions of wholewheat dough being stretched and folded into the centre of each ball, then cupped with your hand and the pinched base rolled against the counter.
Here they are again, before and part way through the loaf proof. I started to be concerned by how firm the skin of the dough had become. The recipe I followed didn't mention covering the loaves while proofing, but as it's quite dry in Tokyo during the colder months I think that next time I'll either cover them in plastic or a damp cloth. You can see by the difference in colour in the pre/post photos that the loaves dried somewhat on the surface.
When it came time to score the boule the skin cracked in one place showing me that it was still wet and springy inside, and full of holes, despite the crust. I hoped that the crack would just add to the rustic quality of the loaf. :)
And here's the finished product!
For a first attempt, not too bad, maybe. I was glad that it kept a nice high shape, that it got good oven spring and was fairly 'holey', but I do think there is lots more experimenting to do.
Firstly with the hydration of the dough (more holes please!), and keeping the crust somewhat damp through the long loaf proof by covering - hopefully that would also help with the colouring of the loaf during baking, as these are a bit pale. Here's the crumb, I have to say I was surprised that it looked like bread on the inside when I'd cooled and sliced it. It had a distinctive and very pleasant tangy aroma.
Here are the little wholewheat sourdough rolls. These were wonderfully brown, and look just like the baps or 'barm cakes' we use to have back home in the UK. They remained quite moist inside after baking, with a spongey crumb and also have that wonderful tangy aroma. My partner has packed up sandwiches to take to work tomorrow - buttered, with ham and strong cheddar and a bit of mustard. Gosh these are good with cheddar.
The white sourdough boule, that was fantastic with brie. Really, a heartily recommended combination. Any lingering disappointment with the loaf being a bit pale was brushed away by the taste. If you happen to have some sparkling wine to complete the fermented-foods party, that was a fantastic match too. Go forth and make sourdough!


No comments:
Post a Comment